
Yesterday evening I started wiring the turn signals and hazard lights.
it was really tricky because i had a box for negative ground
but my car is positive ground
I could buy a new one,
but why would I do that
i can use realys to change everything
besides, the box I would prefer is not available to order at the moment
it is a box with everything together in one box
maybe in summer when i have enough time i will build my own multifunctional box like i did for my YA
first i did the wiring for the box, the turn signal and the relay to change the polarity
the next step was the wiring for the led switches i installed on the dashboard
the turn signal switch was a bit difficult because there was no schematic for it
but i found it
then i connected everything together on the table in our dining room, my wife was cutting hair
after checking all the wires I switched on the power from the transformer
it blinked in the control lamp without pressing the switch
I turned the switch to the left and the test lamp also blinked
the problem was that the current goes from the lamp to the blinker light
as I learned a few months ago
i need a diode
of course i have some in my garage
so some work with the wires and the diodes one for left one for right and then to the indicator light
now everything works as it should on my table, the direction light the hazzard light and both control lights are working as they schould work
so i thought 2 hours ago,
but when i switched the hazzard light the control lamp for direction light and the control light for hazzard light was working together
2 more diodes have to be placed in the wires from the direction light switch to the KabelSchmdt box
now all is working
good to know how a diode is working, and good a have a friend with this parts in his cellar and he knows what kind i should use
thanks for the help Martin
next step will be to control all in my proficad wiring diagramm, most is right i hope, only the diodes are missing
all my fine wires are packed in a slotted corrugated tube,
but so that you can not see it
I will first wrap the corrugated tube with cloth tape but then cut it open again
put the wires in it and cloth it again with a longitudinal cloth strip
that is my plan
perhaps it is good weather tomorrow so that i can go in my garage to make the first steps on the car
again a big step forward
MG TA1932 in Germany - Blog - all problems and ...
-
Franz Tenbrock

- Posts: 570
- Joined: Wed Jul 11, 2018 9:39 am
- Location: Waltrop Germany
-
Franz Tenbrock
- Posts: 570
- Joined: Wed Jul 11, 2018 9:39 am
- Location: Waltrop Germany
Re: MG TA1932 in Germany - Blog - all problems and ...
first i wanted to install the cjr3 in the car
but there was a second hole where the cables should go through the bulkhead
this should be closed
why does someone cut such a bad hole
I took an old water pliers and cut the head of the pliers a little smaller, so I could reach through the hole from below to press the edge smoothly
then I cut a piece of metal and welded it in the hole with some points
then everything primed spatula primed and then painted
in the paint is now reflected the lighting
must still polish everything, but in winter at 10 degrees everything dries slowlyfirst i wanted to install the cjr3 in the car
but there was a second hole where the wires should go through the bulkhead
that should be closed
better like this
- Attachments
-
- Loch4.JPG (45.11 KiB) Viewed 3705 times
-
- Loch3.JPG (53.28 KiB) Viewed 3705 times
-
-
-
Franz Tenbrock
- Posts: 570
- Joined: Wed Jul 11, 2018 9:39 am
- Location: Waltrop Germany
Re: MG TA1932 in Germany - Blog - all problems and ...
as I had written a few days ago, I want to put the cables in modern corrugated tube, I do not like it when the glue messes up the beautiful cables
so that it is not immediately recognizable I have the corrugated tube wrapped with cloth tape and then cut open again
here is an example of how it will look
so that it is not immediately recognizable I have the corrugated tube wrapped with cloth tape and then cut open again
here is an example of how it will look
- Attachments
-
-
Steve Simmons
- Site Admin
- Posts: 2737
- Joined: Wed Dec 26, 2012 10:48 am
- Location: Southern California
- Contact:
Re: MG TA1932 in Germany - Blog - all problems and ...
Wow, that's a terrible hole someone cut in your firewall!
-
Franz Tenbrock
- Posts: 570
- Joined: Wed Jul 11, 2018 9:39 am
- Location: Waltrop Germany
Re: MG TA1932 in Germany - Blog - all problems and ...
there was a terrible hole Steve
its gone with some work
now all wires are off the car
in the front to the sidelamp and headlamp it was difficult because a lot of tape around the old wires
what is the best way to insert the new ones
also the sidelamps are prepared ready with the new switchback amber white LED
its gone with some work
now all wires are off the car
in the front to the sidelamp and headlamp it was difficult because a lot of tape around the old wires
what is the best way to insert the new ones
also the sidelamps are prepared ready with the new switchback amber white LED
-
Franz Tenbrock
- Posts: 570
- Joined: Wed Jul 11, 2018 9:39 am
- Location: Waltrop Germany
Re: MG TA1932 in Germany - Blog - all problems and ...
8 degrees outside. warm for winter
i installed the printed regulator housing
the wires in the wrapped corrugated tube through the bulkhead to the inside
inside again with another corrugated tube, up to the connection for the cable from the wiper motor which is connected with a bullet connector to cable 15
then to the middle
next step was installing the dashboard without the middle part
looks grat to me
made some little changes to the fuel tap, a little bit smaller now
- Attachments
-
-
- regulator 2.JPG (40.23 KiB) Viewed 3692 times
-
-
-
Franz Tenbrock
- Posts: 570
- Joined: Wed Jul 11, 2018 9:39 am
- Location: Waltrop Germany
Re: MG TA1932 in Germany - Blog - all problems and ...
I also routed the new cables on the front left side
led them from the bottom to the top and then to the headlight
wound a small cable on the right cable and then pulled up
went better than expected
all cables are in corrugated tubes
reached now the left side of the car
perhaps i will make the left side in the evening
drinking a coffee now ;-)
led them from the bottom to the top and then to the headlight
wound a small cable on the right cable and then pulled up
went better than expected
all cables are in corrugated tubes
reached now the left side of the car
perhaps i will make the left side in the evening
drinking a coffee now ;-)
- Attachments
-
Re: MG TA1932 in Germany - Blog - all problems and ...
The cloth tape wrapped corrugated tube looks very period. Much better than plastic. Nice job!
-
Steve Simmons
- Site Admin
- Posts: 2737
- Joined: Wed Dec 26, 2012 10:48 am
- Location: Southern California
- Contact:
Re: MG TA1932 in Germany - Blog - all problems and ...
Yes, I agree that was very clever!
-
Franz Tenbrock
- Posts: 570
- Joined: Wed Jul 11, 2018 9:39 am
- Location: Waltrop Germany
Re: MG TA1932 in Germany - Blog - all problems and ...
Left side ready too
I am now to the point the cable should go up to the Regulator
Was a little Bit oily
But the cables still clean
and really easy to wrap it
under the car i haven t cut it open because the oil stoped the glue
i would never buy a complete harness
I am now to the point the cable should go up to the Regulator
Was a little Bit oily
But the cables still clean
and really easy to wrap it
under the car i haven t cut it open because the oil stoped the glue
i would never buy a complete harness
-
Franz Tenbrock
- Posts: 570
- Joined: Wed Jul 11, 2018 9:39 am
- Location: Waltrop Germany
Re: MG TA1932 in Germany - Blog - all problems and ...
work in progress
like this i reach all parts i need
now all cables are in the tubes and also wrapped.
has cost me 1 hour. with the tube it is much easier
pity that I did not know the YA yet, goes so much faster, looks much neater and the cables remain clean, if you have to change something just slit the tube lengthwise
to the rear I have inserted an additional purple cable, some power for a wlan camera
left right front one bullet conection for the sidelights
the cables for the direction lights i will connect in the regulator case
also the cables for the lights i hope enought room there
i will have a single tubne for the front and one for the back
so any changes will be so easy
- Attachments
-
- aufgebockt.JPG (54.96 KiB) Viewed 3672 times
-
- aufgebockt2.JPG (59.5 KiB) Viewed 3672 times
-
Franz Tenbrock
- Posts: 570
- Joined: Wed Jul 11, 2018 9:39 am
- Location: Waltrop Germany
Re: MG TA1932 in Germany - Blog - all problems and ...
Hi
today i made the wiring in the Regulator box
i was really afraid to get the cables all in the small box
now it is done
and i like it very much
i have one harness for the front and one for the back and one for fuel pump, coil and generator
a clear and easy solution i think
my car is not original, so it doesn t matter
a TA chassis perhaps a TC body a TD engine a laystall had and my different wiring.
- Attachments
-
- Regulator 13.JPG (48.79 KiB) Viewed 3655 times
-
-
- Regulator 11.JPG (66.89 KiB) Viewed 3655 times
-
-
Franz Tenbrock
- Posts: 570
- Joined: Wed Jul 11, 2018 9:39 am
- Location: Waltrop Germany
Re: MG TA1932 in Germany - Blog - all problems and ...
today in ttt2 was an article about the 1130 sidelight and the installation of 2 lights
it was also about originality
in the 80's my car was probably brought to germany and restored - then maintained by 3 older gentlemen and driven quite little.
i fell in love with the car when i saw it, not knowing what a real ta is
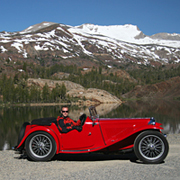
so i got a bastard that has a great engine . solid wood and metal and drives very nice.
the electrics worked but the wire colors were more german system than original
also just had a more modern regulator and safety coil mounted, made some holes for it and so on,
if I would make the ta now original I would have to spend vast sums of money what I can not and also do not want
so I try to make the car at least visually look like it should be.
a cjr3 would cost well over 300 euros and then could not even be connected as it was original because I had a 2 coil generator, so destroy money
my solution is now a housing which is not original only at 2nd glance, it has the correct dimensions but the content is such that I can have a safe electrical system, old switches are not overloaded .
my solution cost me only a few euros for printing filament
These cars had no flashing light and also no warning light, but it is mandatory today ..,
so you are forced to attach to the dashboard switches, if you search the internet you see the most diverse solutions, always you see these in my eyes ugly big switches that do not belong to the dashboard, my solution was , a modern led switch but only when looking closely at all recognizable,
you need a direction light in the front and the rear, so you need additional lights, so it looks different and original
if you put two lights in the 1130 you have the problem that it is difficult to see the amber light when the white light is shining. The onyl way to make it secure is, to switch of the white light when you use the amber light, so difficult electrik or a modern switch back led i will use. both not original but there is no original way to make it
i love the way driving this old cars it is car driging and not sitting in a computer, the wind in your hair and the laughing people on the road
Modern techniques like 3D printing make it affordable to preserve the old cars and that's a good thing
such a fantastic car belongs driven on the road and not in a showroom
i'm waiting for parts again, next week i'll be in the snow, then 1 more week of vacation and then everything should go again.
then new brake lines, new brake pads and silicone brake fluid and saison can start in march
it was also about originality
in the 80's my car was probably brought to germany and restored - then maintained by 3 older gentlemen and driven quite little.
i fell in love with the car when i saw it, not knowing what a real ta is
so i got a bastard that has a great engine . solid wood and metal and drives very nice.
the electrics worked but the wire colors were more german system than original
also just had a more modern regulator and safety coil mounted, made some holes for it and so on,
if I would make the ta now original I would have to spend vast sums of money what I can not and also do not want
so I try to make the car at least visually look like it should be.
a cjr3 would cost well over 300 euros and then could not even be connected as it was original because I had a 2 coil generator, so destroy money
my solution is now a housing which is not original only at 2nd glance, it has the correct dimensions but the content is such that I can have a safe electrical system, old switches are not overloaded .
my solution cost me only a few euros for printing filament
These cars had no flashing light and also no warning light, but it is mandatory today ..,
so you are forced to attach to the dashboard switches, if you search the internet you see the most diverse solutions, always you see these in my eyes ugly big switches that do not belong to the dashboard, my solution was , a modern led switch but only when looking closely at all recognizable,
you need a direction light in the front and the rear, so you need additional lights, so it looks different and original
if you put two lights in the 1130 you have the problem that it is difficult to see the amber light when the white light is shining. The onyl way to make it secure is, to switch of the white light when you use the amber light, so difficult electrik or a modern switch back led i will use. both not original but there is no original way to make it
i love the way driving this old cars it is car driging and not sitting in a computer, the wind in your hair and the laughing people on the road
Modern techniques like 3D printing make it affordable to preserve the old cars and that's a good thing
such a fantastic car belongs driven on the road and not in a showroom
i'm waiting for parts again, next week i'll be in the snow, then 1 more week of vacation and then everything should go again.
then new brake lines, new brake pads and silicone brake fluid and saison can start in march
-
Franz Tenbrock
- Posts: 570
- Joined: Wed Jul 11, 2018 9:39 am
- Location: Waltrop Germany
Re: MG TA1932 in Germany - Blog - all problems and ...
i will drive skiing in the night
so last job before holiday
this a small cob leds with glue pad in the back, bright light
and really easy to install without destroying anything on the lamp
i only took off the lamp holder to get a good light inside without any shade
done in some minutes
i think the best and simpelst solution to make a change to led
and so cheap
will add the bullets so i can use the origina connection
now enought light in the back, and it is red light, difficult to see it in the picture
- Attachments
-
-
- rücklicht2.JPG (44.83 KiB) Viewed 3611 times
-
-
Franz Tenbrock
- Posts: 570
- Joined: Wed Jul 11, 2018 9:39 am
- Location: Waltrop Germany
Re: MG TA1932 in Germany - Blog - all problems and ...
have been in holiday with my son one week
was wonderful
the snow was perfect
and the weather too as you see
one more week holiday, i hope i can finish the eletric
today i found a problem when i wanted to install the sidelamps
before holiday i tested the swithcback led, and i thought they are non polarity sensitiv
but today i saw they don t work as they should when i have positive earth
only amber light is working. on both points
with negative earth all is working as it should, so i had to look for a non polarity lamp
i found one, i will install it with the wrong lamp to test all
also i found a way to install the 1130, the bullets will be outside of the lamp case because like this it is easy to install all
the light from this lamps are really bright and with my printed lens it looks perfect
my MG YA story is printed in Oldtimer Praxis 2/2022 , got 60 pictures from a professional photograph
have to ask if i can post one here ;-)
here a link
https://de-de.facebook.com/oldtimerpraxis/
- Attachments
-
-
-
Franz Tenbrock
- Posts: 570
- Joined: Wed Jul 11, 2018 9:39 am
- Location: Waltrop Germany
Re: MG TA1932 in Germany - Blog - all problems and ...
today i worked on the front of the car
first installed the headlights
just had to install the bullets
then I wanted to install the horn, but the left one does not work
so I took it off
opened it up and saw some burnt wires
then i took off the right one
this one worked
opened it up and saw it was a little different
no capacitor present
so a later part?
this one worked,
i also opened this one and cleaned all parts
it sounds good so i installed it on the left side maybe i will just use this one,
it tanks 2,5 amps when it works
after that i took the condenser off, cleaned it and saw the letters on the part.
it is from 1949, so really old, at this age it could be damaged
i will ask a friend if he has such a capacitor
i tested the solenoid without the capacitor and the horn makes a short loud sound
so if i have a new capacitor it should work again
- Attachments
-
-
-
-
-
- Lampe links.JPG (51.07 KiB) Viewed 3555 times
-
Franz Tenbrock
- Posts: 570
- Joined: Wed Jul 11, 2018 9:39 am
- Location: Waltrop Germany
Re: MG TA1932 in Germany - Blog - all problems and ...
now I have two versions of taillight and brake light with LED inside
version 1 (first picture) is much brighter and I will use this one
the second one will be in the car in case I have problems one day
there you can change the lamps, but led will work 50000 hours
after my life is over :-)
i had made some little changes to Version 1 as i have posted some days ago
now the brake light is all the same
but if i would do it again i would order a bigger one for the break light so i have only one in this position
but the parts i got was smaller then they have offered
will install it tomorrow
perhaps i can finish it tomorrow
i hope all will work as it should work
- Attachments
-
-
-
Franz Tenbrock
- Posts: 570
- Joined: Wed Jul 11, 2018 9:39 am
- Location: Waltrop Germany
Re: MG TA1932 in Germany - Blog - all problems and ...
now both parts installed in the back
the wires under the car are properly fixed
in the back the wires are also in the tube
concted with bullets as original i think
a friend checked the horn and give me a link for a condenser which should work
so i orderd, you will read if it will work
it seems to be the wt28u a loud horn, i will see and hear
now i will check the wiring diagramm for the generator coil and fuel pump
shouldn t be not difficult
- Attachments
-
-
-
Franz Tenbrock
- Posts: 570
- Joined: Wed Jul 11, 2018 9:39 am
- Location: Waltrop Germany
Re: MG TA1932 in Germany - Blog - all problems and ...
in the afternoon i did the last work on the wiring
now i have one harness to the front, one to the rear and one to the shut off switch, fuel pump and ignition coil
only the last 7 cm go together as you can see
under the car the wiring harness is fixed correctly
in the engine compartment I took some velcro straps, which can be opened quickly again
i didn't have the right fuses to test everything yet, can't get them here in town, was a little late,
visited a friend and got some 5 amp fuses
will test it tomorrow morning
hope everything works as I have planned it
behind the dashboard i will take some wagos, if all works perfect i will take a modern 15 pol socket
- Attachments
-
-
-
-
Franz Tenbrock
- Posts: 570
- Joined: Wed Jul 11, 2018 9:39 am
- Location: Waltrop Germany
Re: MG TA1932 in Germany - Blog - all problems and ...
so happy
just tryed the new electric
all seems to work correctly
in the moment i have 5 amp fuses all in and nothing burned
hazaard light is working without ignition
both direction lights in the back are working as they should work
in the front the sidelamps are not installed , i am waiting for not polarity sensictiv switchback leds
now i can clean up the cellar and the garage
i have to intall starter switch again, choke cable and slow running control
so some work, but easy and nothing bad can happen
witht the 7 relays i have now in the car i was a little bit afraid, but if you have understood how they work it is easy
it was a little bit tricky because the kabel-schmidt module was not exactly the right one
it was negative earth and the car is positiv earth
so i had to change the polaritiy with a relay
first i will do is install the new 15 pol socket behind the dashboard so it is easy to take it off
but all works now