A Technical Review of the:
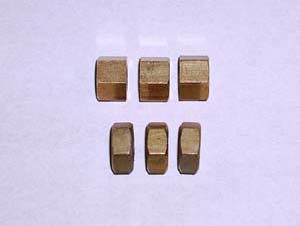
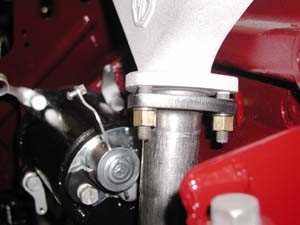
MG TC EXHAUST SYSTEMDoug Pelton The exhaust system has been one of those areas that have plagued numerous TC owners with countless hours trying to fit and fix habitual exhaust leaks with modern day replacement parts. In order to understand the system and offer solutions, we must review each segment starting with the exhaust manifold and continue to the tailpipe. This review will also offer what was original, what is available today, and solutions to common problems. 1. Exhaust manifold: There are 3 studs screwed into the manifold to hold the down pipe. Through the years some of these have been stripped out and replaced with an oversize hole and bolt. Just use a helicoil to return to the original studs. Also, before you use a pipe wrench or piers to extract or insert the suds, just double nut them, tighten, and the use a normal wrench to remove or replace. This avoids any damage. Also, you should note the length of the manifold studs. TC studs are 1 7/8" long compared to TD studs which are 1 ½"" long. Through the years parts have had a tendency to migrate between models. 2. Exhaust manifold and down pipe connection: The order of assembly for this area is the manifold, layered (copper and asbestos) gasket, cupped washer, down pipe, which are all held in place with the flange and 3 brass nuts. The original system had the cupped washer as central element that was the key to the design. The cupped washer was made to fit snuggly into the flared end of the down pipe to complete the seal and yet rotate and swivel to allow alignment of the down pipe to the engine bracket and muffler. Many installations have had no problems and the system has bolted together as stated. However, many of today's replacement down pipes have not been "flared" to the correct diameter of the cupped washer. Therefore, there can be a gap of up to 3/16" between the wall of the down pipe and the cone of the cupped washer. This has led to the chronic exhaust leak. In the long term, the manufacturers must adjust their tooling to correct the problem. In the short term, for those that experience this problem, there is a simple solution. That solution is to discard both the cupped washer and copper gasket and replace it with the exhaust flange gasket of an early model MGB. It has a combined cone washer with gasket material that fits nicely into both the exhaust manifold and exhaust down pipe. Tighten the brass nuts and lock washer and you are done; almost. Did you know that the original brass nuts (10mm x 1.5) are longer (about ½") in length? These original nuts have somehow been lost with time and replaced with modern standard thickness metric nuts.
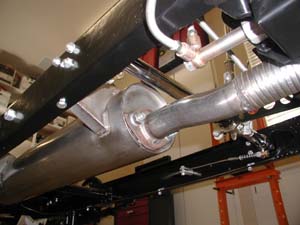
3. Bell housing bracket: The next point of attachment is the down pipe to the bell housing. This has also been a problem area in that it does not always connect to the bell housing. Originally, there was an additional bracket that has lost, misplaced, or discarded. When the engine and gearbox was installed at the factory, they had a metal tab bolted to 1 bolt on the bell housing (at the 5 o'clock position). It had 2 additional blank holes that were also elongated for adjustment. According to the original MG Midget Factory Specifications #259, there were 2 - 5/16 BSF x 5/8" bolts w/ flat and lock washers used to attach the welded tab on the down pipe to the bell housing bracket. Depending on the today's exhaust system manufacturer, the welded tab on the down pipe may or may not fit directly to the bell housing. If it does not, you can make a simple bell housing bracket. Just use a piece of stock steel measuring 2 ½ " long x ¾" wide x 1/8" thick. Drill a 5/16" hole for bell housing bolt and 1 or 2 - 3/8" holes for exhaust pipe bracket tab. There have been reports of some who have replaced or re-welded the down pipe tab with a longer one to get it to fit. Others have simply ignored this tab and never bolted it to anything which has never really caused any other problems. This hand made bracket solves the bell housing connection problem. 4. Down pipe to muffler connection: This connection is very simple with the flange compressed against the muffler with a gasket in between. The 2 studs are integral to the muffler itself. Original size nut was 3/8 BSF with flat and lock washer. A simple trick to hold the gasket in place during install is to use a little "plumbers putty" on the gasket and press in place. This will hold it temporarily and squeeze out when tightened to form a seal.
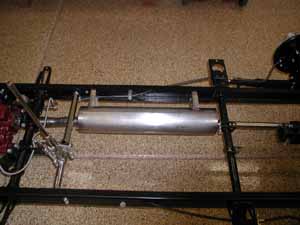
5. Muffler: Original factory documents refer to the muffler as a "Burgess Silencer". Burgess was the manufacturer back then and is still in business today as Burgess-Manning manufacturing the same. The muffler is bolted to the frame with 4 - 5/16 BSF x 5/8" bolts, lock washers and hex nuts.
6. Muffler to tail pipe: One item that is conspicuously absent from parts manuals and even the factory #259 specifications is that there was no clamp to connect the tail pipe to the muffler. The simple reason is that when the tail pipe was mated to the muffler at the factory it was welded in place. There was no clamp. However, today's mufflers and tail pipes are sold separate so they do require a clamp. The simple solution is a standard 1 ½ exhaust clamp available at any local muffler shop. However, if you want to have something that would be correct for the "period", I would suggest ¾" wide, 1/8" thick strap steel wrapped around the connection and held with a single 5/8 BSF bolt. This would be similar to the tail pipe "P" clamp with out the tab to bolt to the frame. 7. Tail pipe clamp: The tail pipe clamp is readily available and holds the tail pipe rigid to the frame just below the gas tank area on the driver's side. It requires a 5/16 BSF x 7/8" bolt with flat and lock washer and hex nut. 8. Flexibility: The exhaust system is held rigid to the engine, from the exhaust manifold to the connect point at the bell housing. It is also held rigid to the frame, from the muffler to the tail pipe. In order to allow flexing between the engine and the frame, there is a "flexible" portion of the down pipe between connecting bolt to the bell housing and the muffler. Final thoughts: If you experience any uncommon noise from your system, it is normally caused by a crack or hole in the pipe or muffler connections. I would suggest you inspect each of the areas discussed above and hopefully it is only a matter of loose hardware. Although original systems were made of plain steel, most of today's replacement systems are stainless steel. These newer systems provide years of durability. I would welcome any comments on the above sent to: dougpelton@cox.net.
|
|||||
 |
 |
||||


